Remove, Restore And Replace the Dash Pad
Forty-six years ago automotive excess was in demand. All steel, finned behemoths draped in exotic colors and carrying a literal ton of chromium were the rage! There was no such thing as too much back in the day, just consider the name of the paint color on this Chrysler – Dubonnet! This survivor ’61 Newport has lived in Southern California since birth, and it’s a well-preserved, rust free cruiser. The only noticeable interior damage was created by a mischievous Mother Nature, a cracked and peeling dash pad. This pad is vinyl over a foam cushion without any firm substructure. It simply was fitted over the steel dash and held in place by pins, studs with speed nuts and trim pieces.
The car was brought to Just Dashes, in Van Nuys, CA to have the damaged pad removed and a new recreation installed. The owner was not experienced with this type of work, so he decided to let the experts tackle the R&R, and that was a good decision as it is slightly complicated process. For those of you with vehicles of this vintage who would like to attack the removal procedure, we documented most of the high points that might give you trouble. No special tools are required, just a few hours and a trunk full of patience. Just Dashes craftsmen produce an exact recreation of the original pad and can color it in any original factory hue, or any custom color you might choose. When ordering a replacement pad, it’s a good idea to leave the original in place until you receive the new one so you can compare the mounting points, etc. We will start the removal at the right side and work across to the left. The photos and captions will describe the rest of the journey to achieve a beautiful classic Mopar dash.
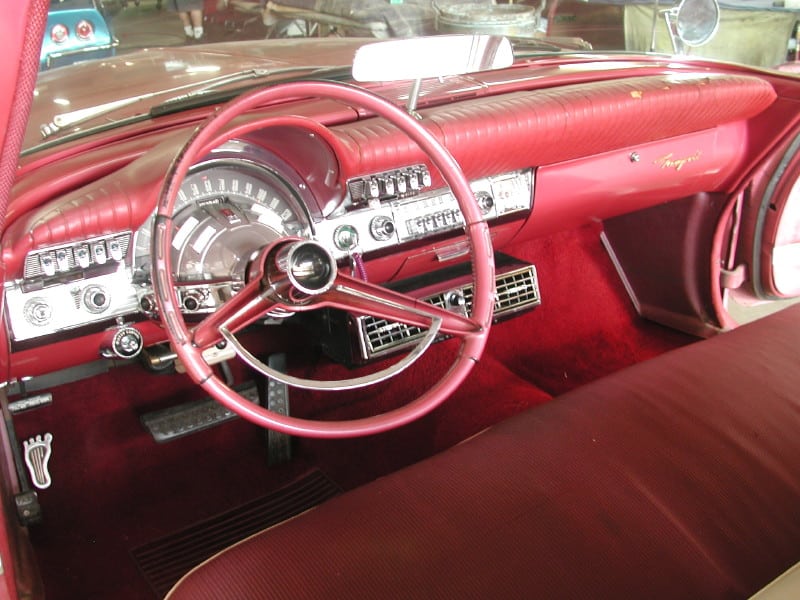
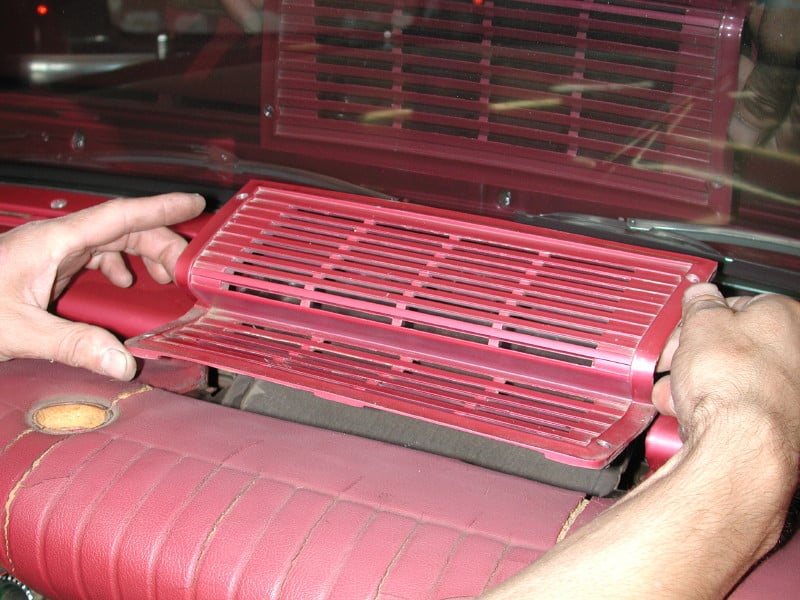
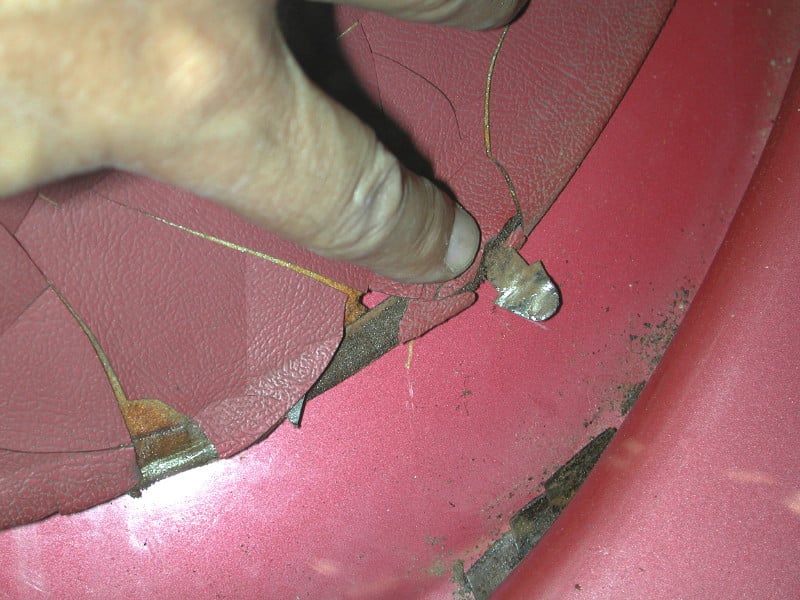
Here’s the original dash pad prior to starting. It’s cracked and some pieces are missing, exposing the old foam underlay. Notice the period aftermarket air conditioner under the dash. It’s literally COOL!
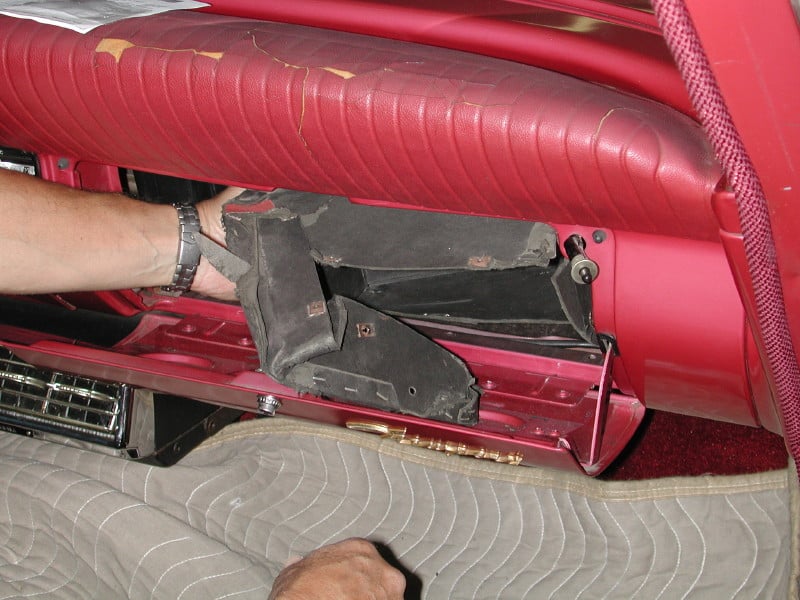
Begin by removing the glove box liner. It’s held in place with several Phillips head screws. These liners were folded to install, so examine the structure, see where the factory folds are and re-fold it for removal.
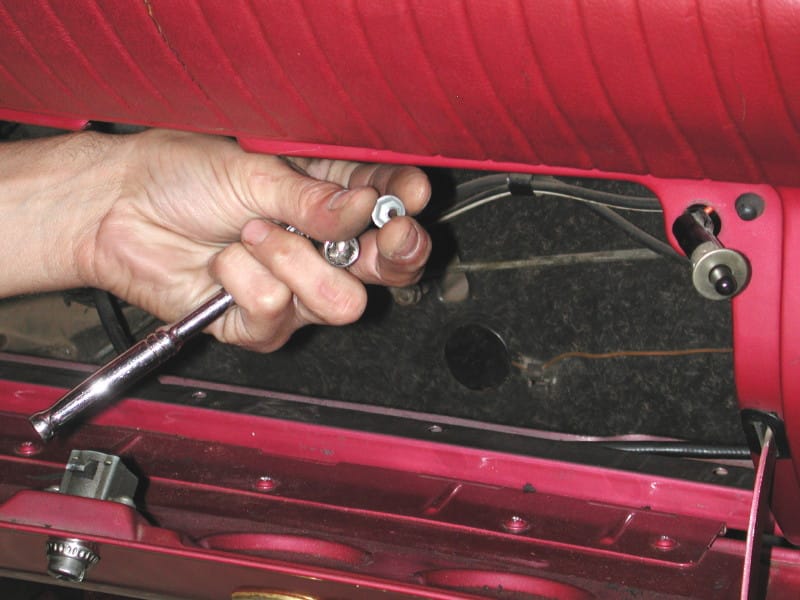
Next remove the metal strip that is above the glove box, it’s secured with four 3/8-inch speed nuts. Make sure you keep all the retainers with the parts as you remove them. Labeled Ziplock bags work well for parts organization.
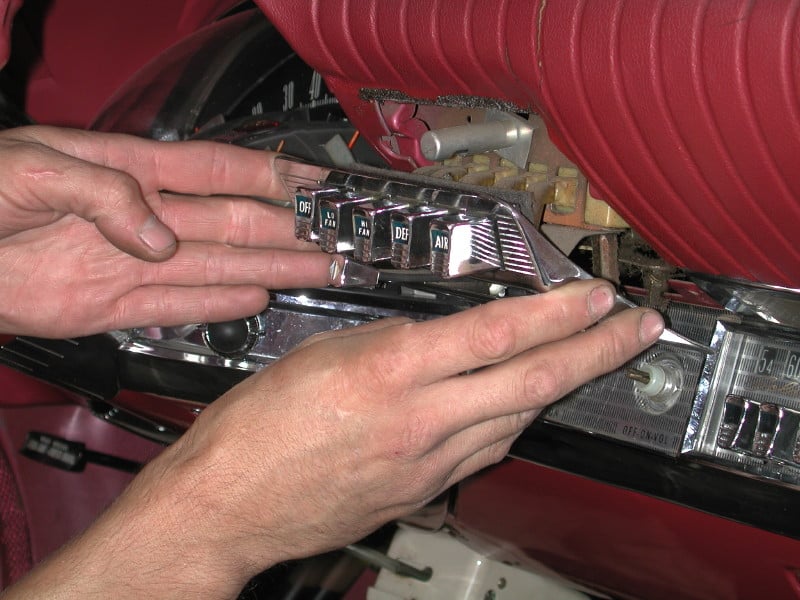
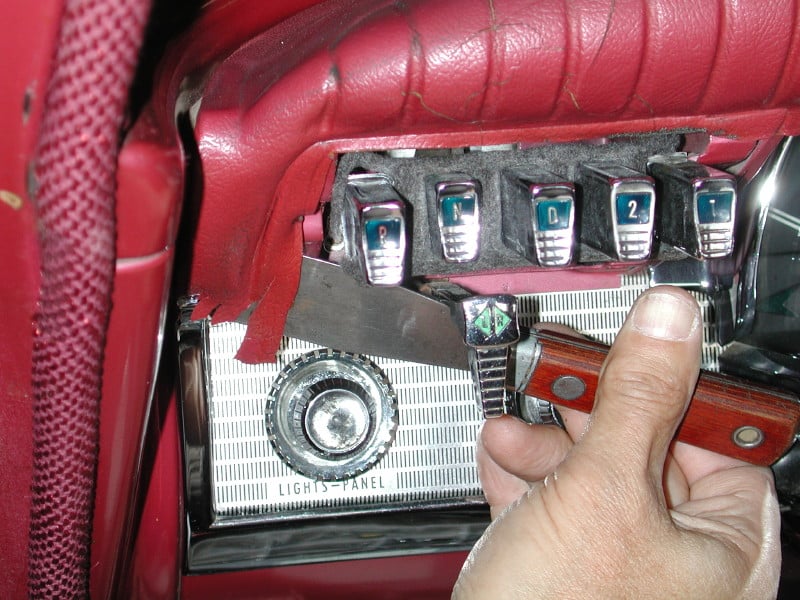
Remove four Phillips head screws from the temperature control panel and pull the panel forward and down. It can just hang there out of the way.
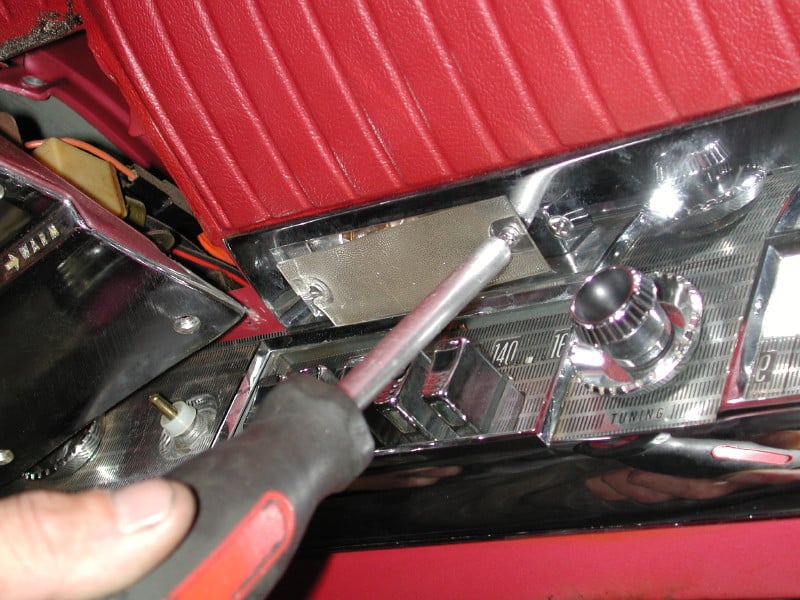
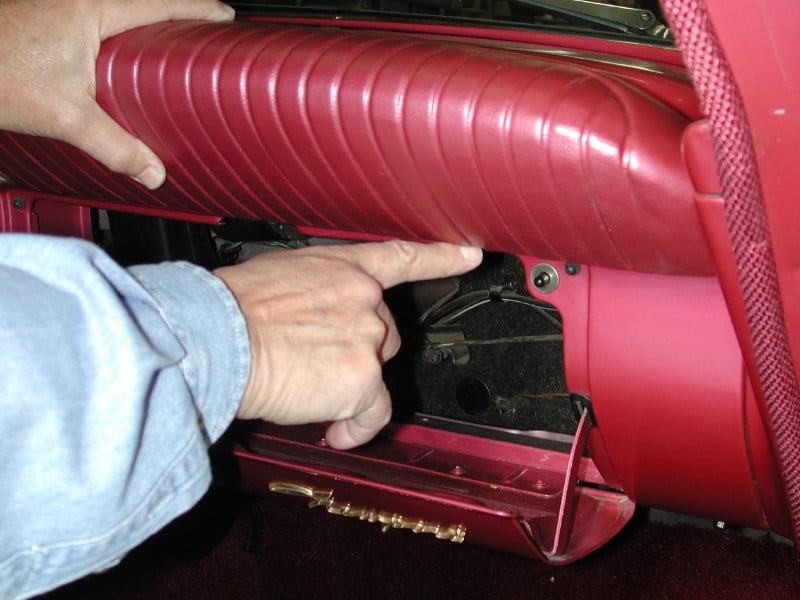
Under the pad and above the radio is a light lens, remove it carefully, it’s glass not plastic!
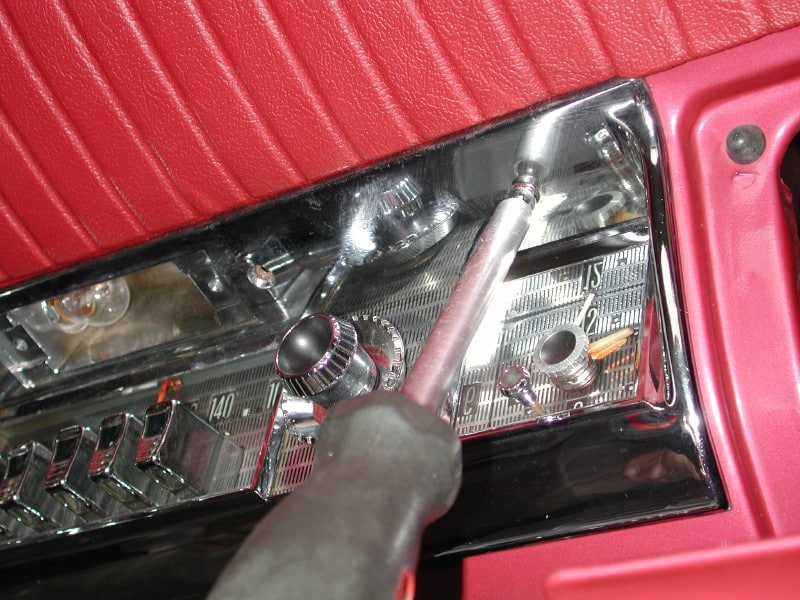
Then remove two Phillips head screws above the radio and clock. This loosens that bezel so you can pull out the bottom edge of the pad later on. Pull the bezel down about 1/8-inch and let it hang.
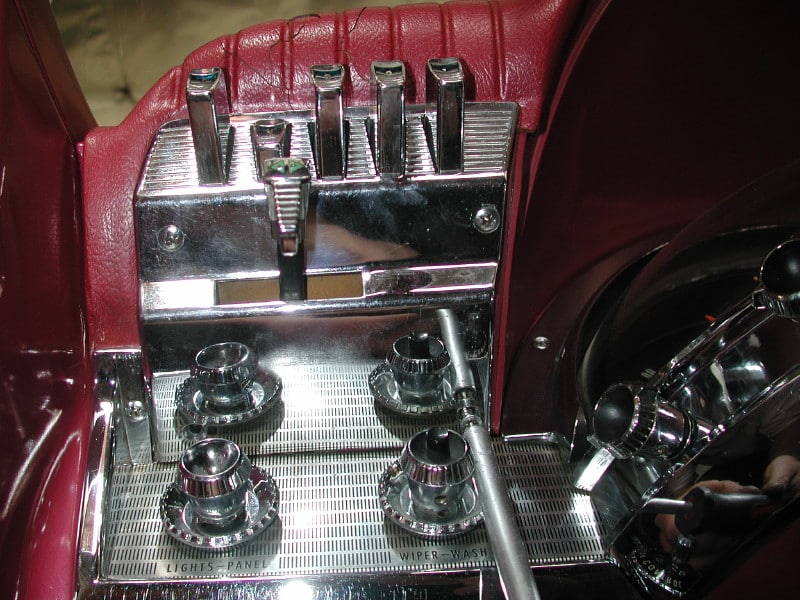
Removing the rear view mirror can be tricky. A 1 3/8-inch nut and a locating plate secure it. It can be accessed through the temp control space and/or the speaker grille area. Using both helps greatly. Speaker grille removes easily as we’ll see in a in a minute.
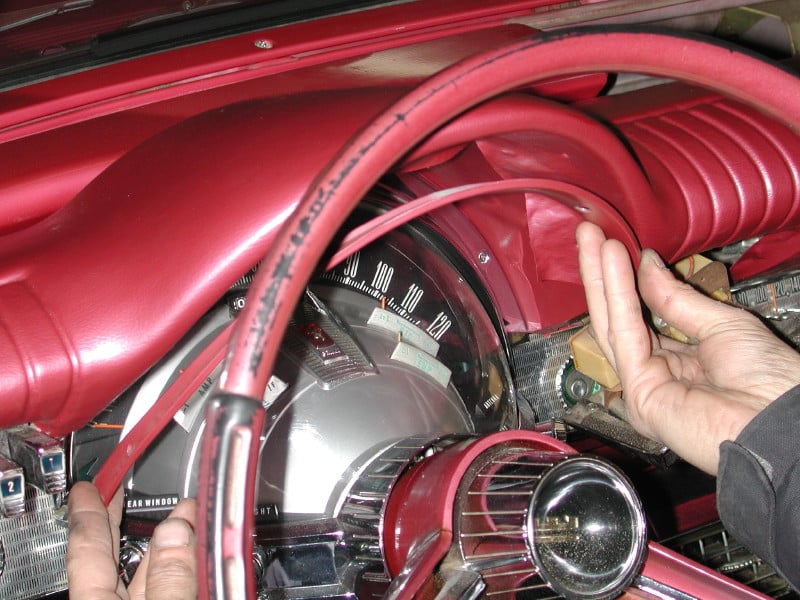
There’s a half circle crown molding secured with five Phillips head screws above the very cool domed instrument cluster. Remove it carefully.
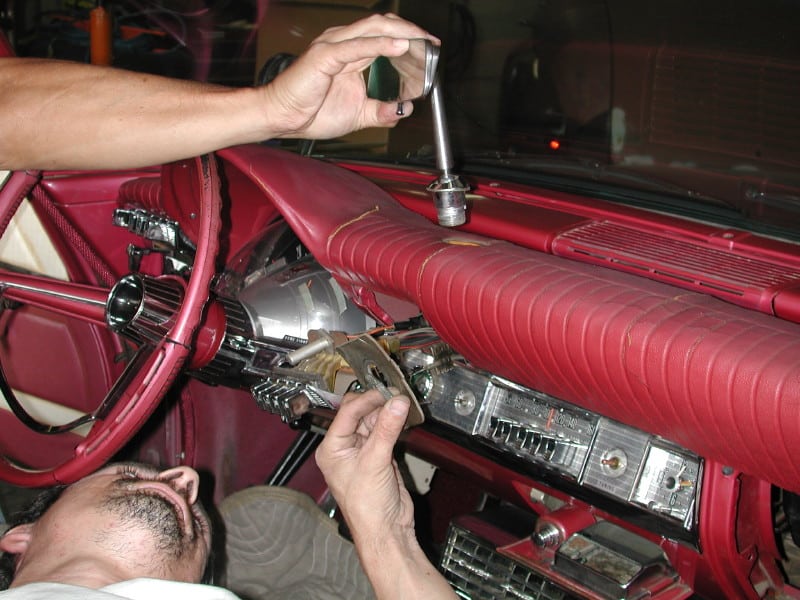
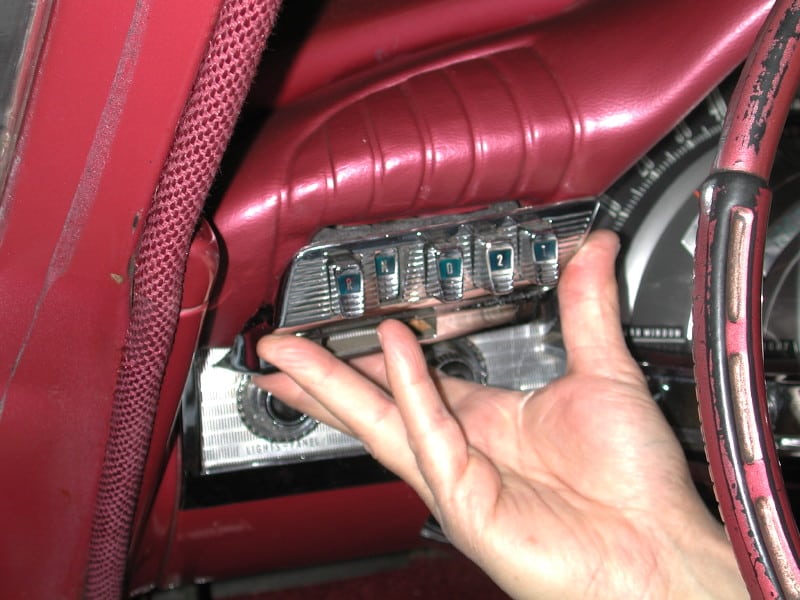
Sorry if this is double vision, but these cars actually had chromed metal everywhere. This is looking up at the bottom of the push button gearshift selector. Remove four Phillips head screws and the turn signal switch knob. The knob is held by an Allen set screw at the bottom.
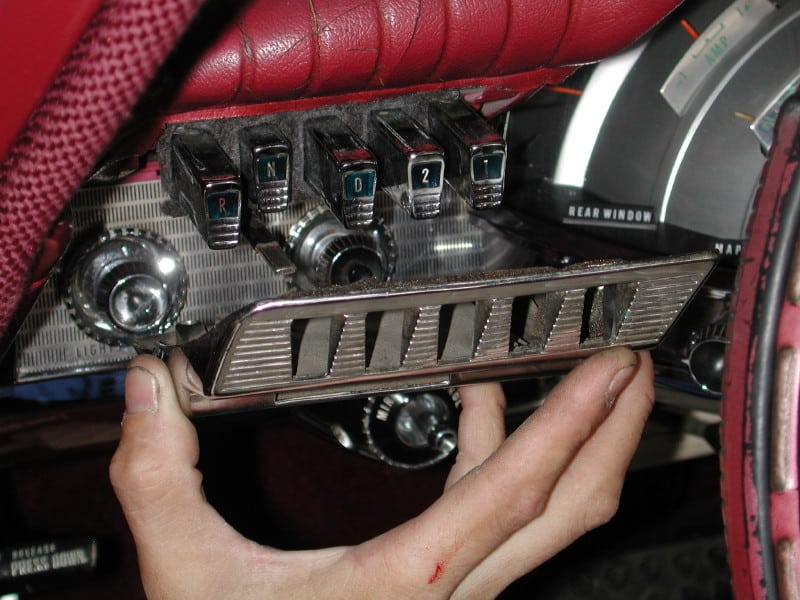
After the screws are removed the gear selector bezel can be pulled forward and removed. Remember to keep all the attaching hardware with each part that you remove for easier reassembly.
Now an easy one. Remove four Phillips head screws holding down the speaker grill, slide the grille forward first and lift it free. You can then easily pull up and disconnect the speaker. If it needs restoration, now’s the time. Through this hole you can also access the large nut securing the rear view mirror. Reach in and straighten two folded wire tabs on each side of the speaker that secure the front edge of the pad to the dash.
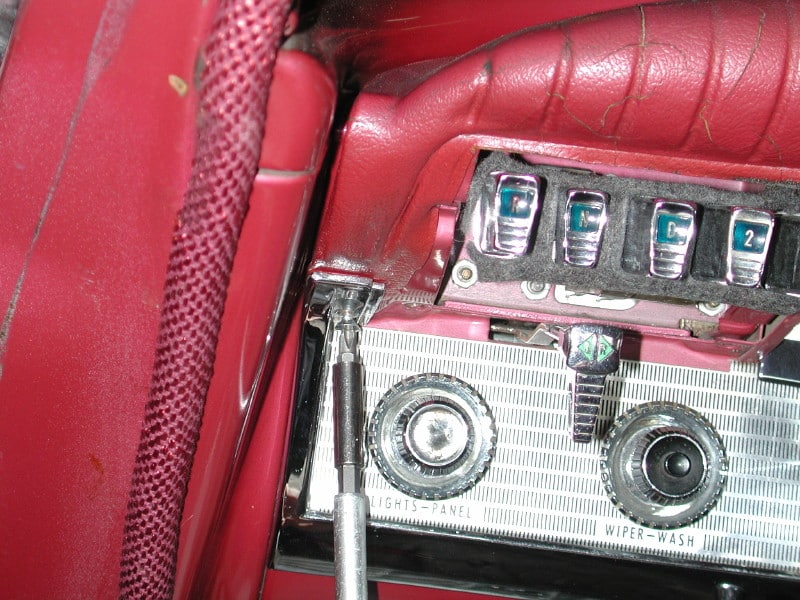
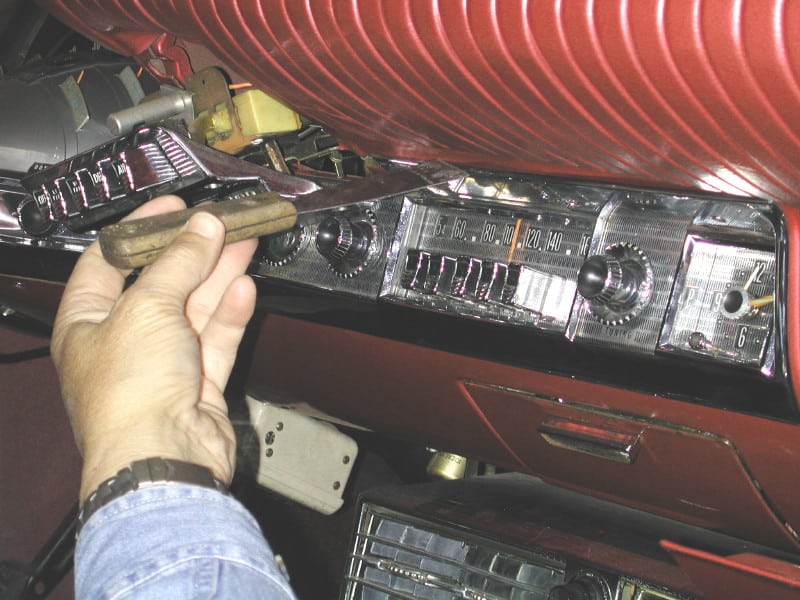
Remove one Phillips screw at the bottom left of the dash that secures part of the lower control bezel.
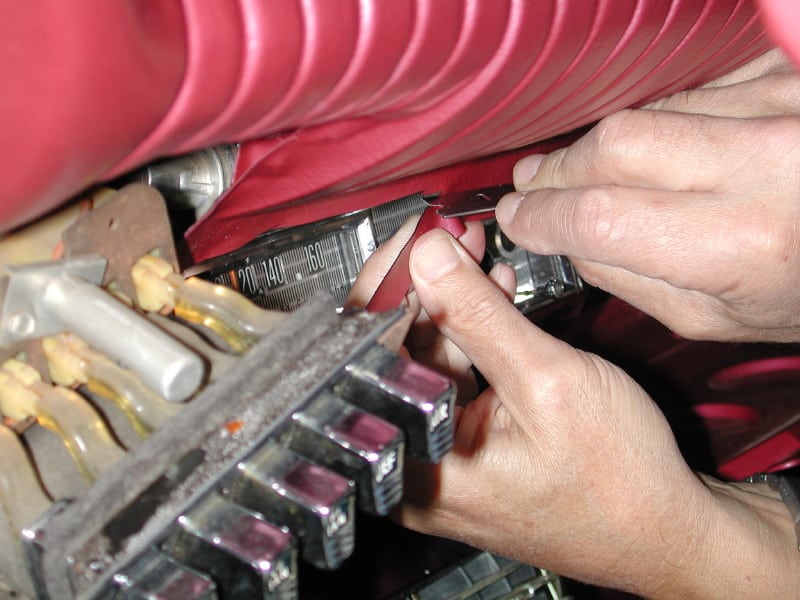
Now the actual material removal begins. Using a small spatula, pry the old material edges out from under the shift control assembly. You might encounter sporadic areas of factory glue, just cut through it with the blade. Wherever you meet resistance use this method to loosen and remove the old pad.
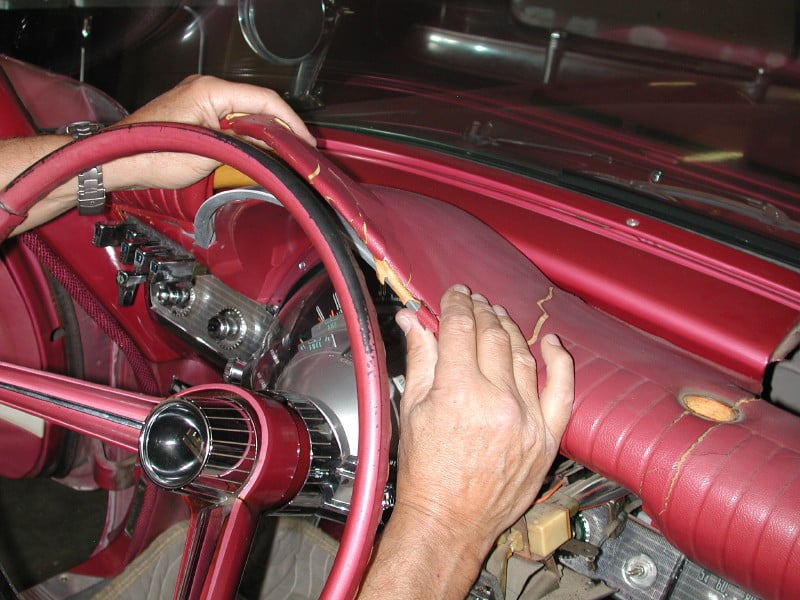
Move along the front edge of the pad, lifting and pulling up as you go. Loosen the complete front/lower edge of the pad first from side to side. Having an accomplice makes the job easier.
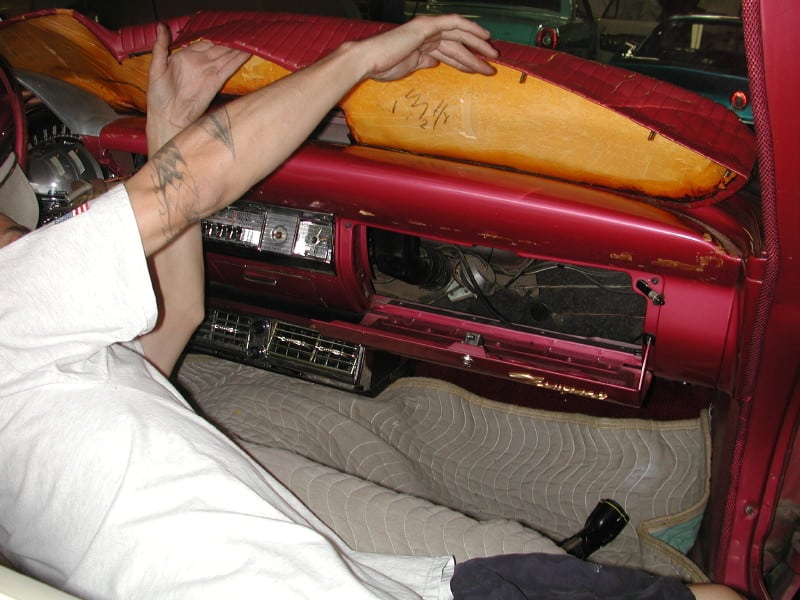
Lifting the pad exposes the studs that were secured with the speed nuts above the glove box. There are also metal tabs at the front edge of the pad that slide under the metal trim at the windshield.
Here is one of the other securing tabs. These push down through the metal dash and are bent back at the factory. You must access them from under the dash, and re-straighten them in order to pull the front edge free.
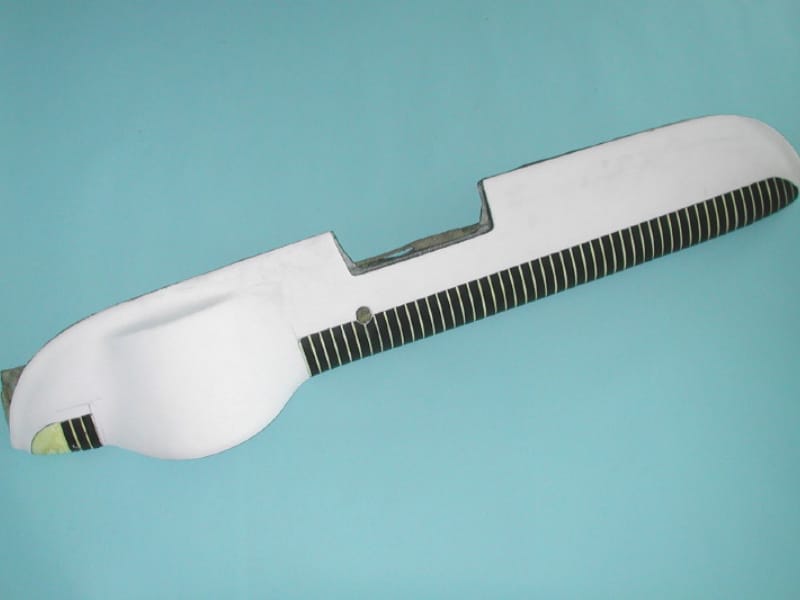
Just Dashes creates this pad using hi-density closed-cell foam, which is then hand shaped. Individual vinyl strips are cut to form the ribs of the pad and provide sharp lines along the rib edges. You can see at the bottom left a small area that is still in process.
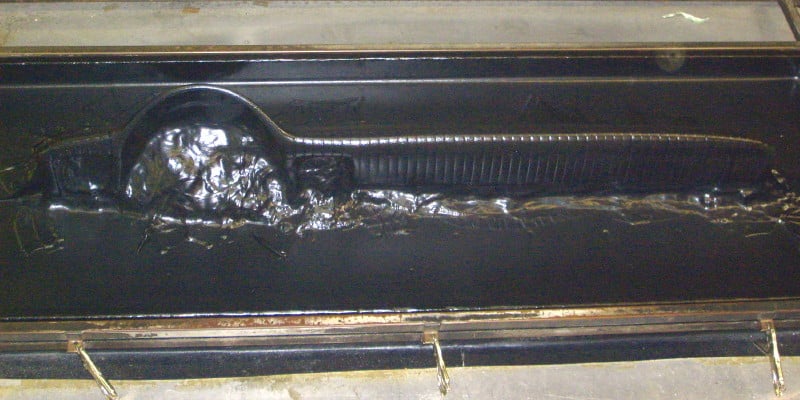
After the pad is prepared a new skin of the correct grain vinyl is Thermo Vacuumed formed over the part. The hot vinyl is sucked down into the rib grooves creating a perfect finished product.
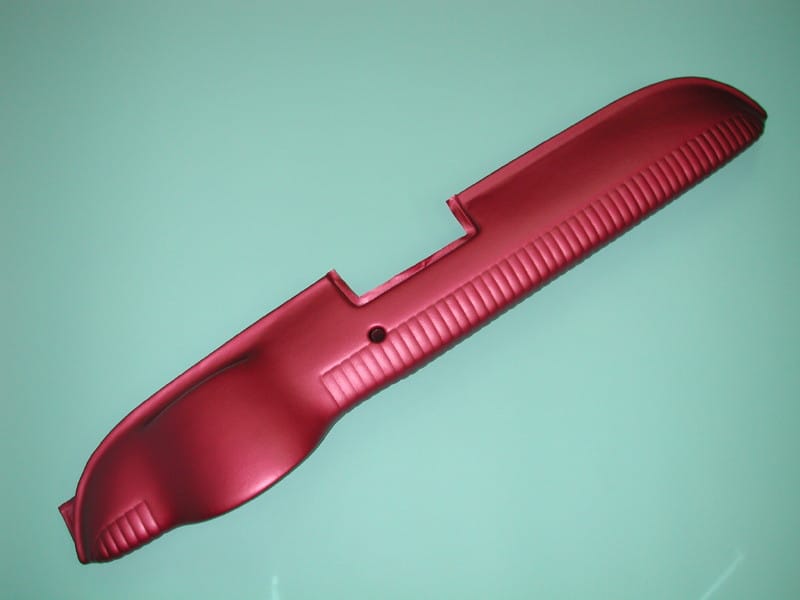
Here’s the finished pad ready for installation. The interior color is also Dubonnet, so this pad has been colored to match.
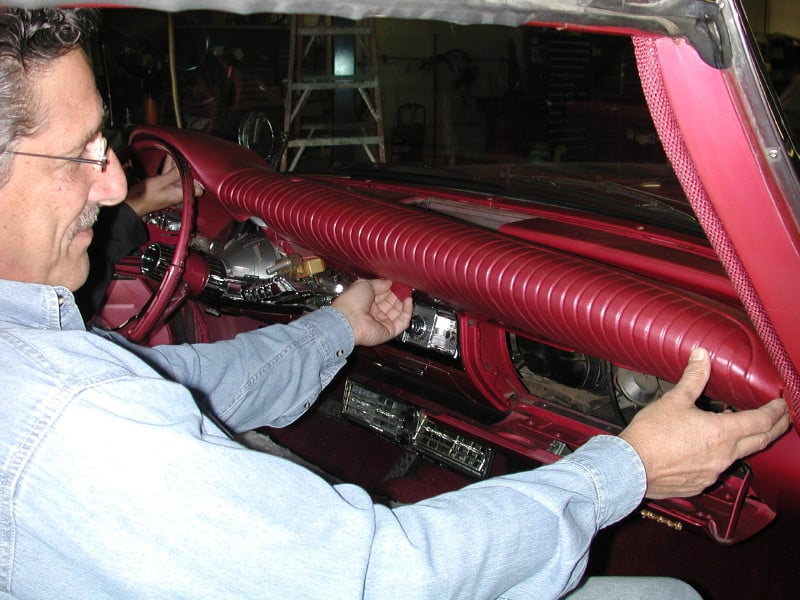
Always test fit the new pad prior to installation. This will show you the attaching points and familiarize you with where everything goes. This is particularly important if you’ve let a long time expire since removal. Trial fitting will spark your memory on the removal. The front edge of the pad is tucked under the front windshield molding. You might need a spatula to push the material all the way under the metal.
Make sure the studs in the pad are completely seated in the holes provided in the metal dash. Double-check each stud prior to installing the speed nuts and tightening.
When pushing the vinyl edge under the dash you might need to trim some excess vinyl to allow the pad to properly seat against the dash. Just Dashes gives you a little more material than you need, as each vehicle might be slightly different.
Use a small spatula to tuck in the excess above the radio bezel. You’ll see as you move right to left how nice the pad starts to fit the dash. No glue is necessary to hold the pad in position.
The crown molding above the instrument cluster can now be replaced using the original mounting hardware.
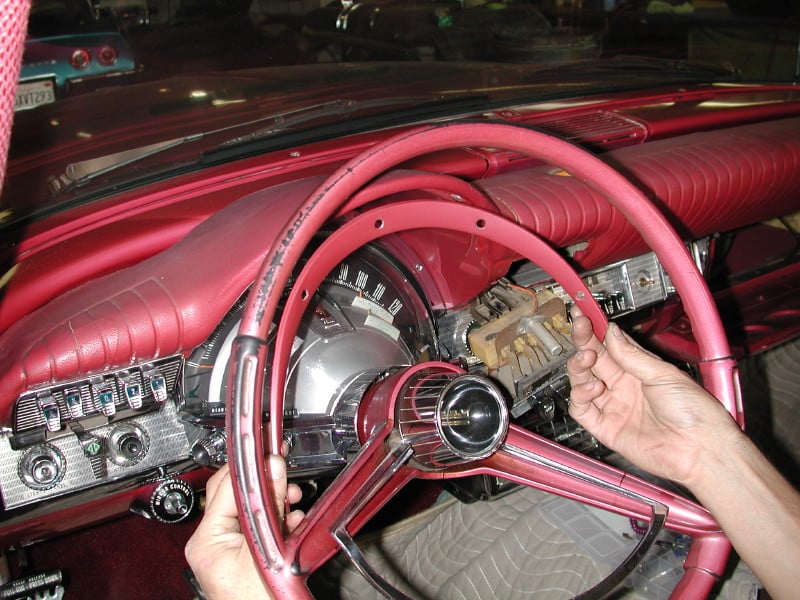
Now you can reinstall the rear view mirror, speaker grille, radio bezel parts, the temperature controls and the gear shift selector control shown here.
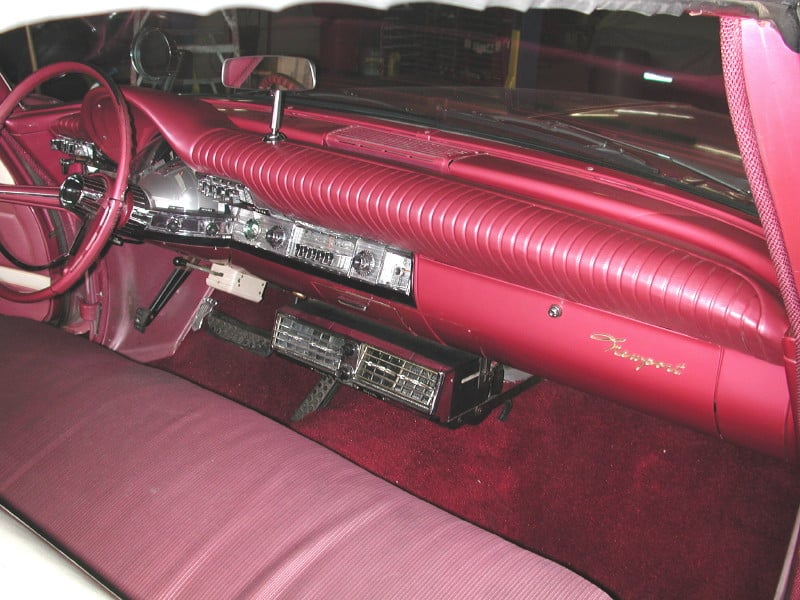
Here’s the finished install. Notice how well the pad color matches the original dash color. Being careful and working slowly the install took about an hour.
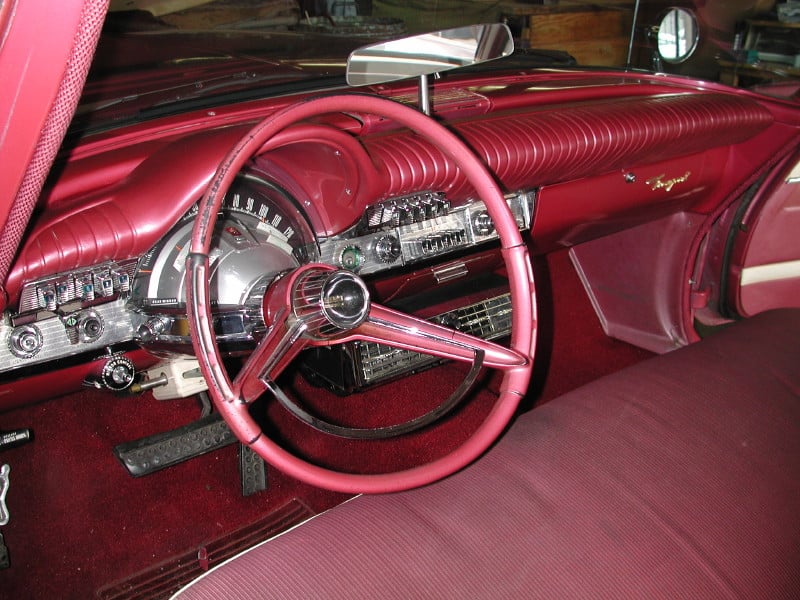
Here’s the finished install. Notice how well the pad color matches the original dash color. Being careful and working slowly the install took about an hour.