Convert your E-body door panels from crank to power windows at Just Dashes.
If you’re considering converting from crank up to power windows for your Challenger or ‘Cuda, or vice versa, Just Dashes has the door panel solution to make the change easier. Now you don’t have to locate and buy original power window panels as Just Dashes can convert your non-power originals and restore the panels as well. Obviously you will have to purchase the control switches and wiring, but usually a complete set-up can be found at Mopar swap meets or in specialty parts publications. On the other hand, if you want to go the other way, Just Dashes can also fill the power window switch hole and convert you to crank windows.
We are going to show you the most complicated part of the panel preparation, the driver’s door. The other three panels can be converted and restored in the same manner. The front and rear panels will be returned to you in your original factory color ready for any show.
Each panel is hand sanded and the window crank hole is filled. Holes are drilled around the exterior of the panel for the vacuum machine to do its job. A new skin, in the correct grain vinyl, is then vacuum formed to each panel and then dyed the correct factory color. If Just Dashes has previously restored your E-body dash pad, your door panels will now match perfectly.
The process demonstrated here is the same used for restoring all E-body door panels with the exception of cutting out the area for the power switch and filling the hole. Since a picture is worth more words than you want to read, here’s the way they do it!
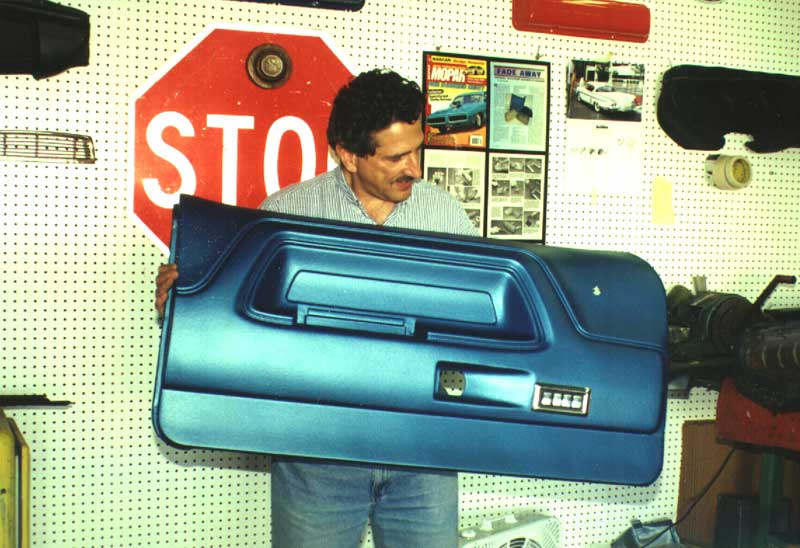
A few hours ago this beautiful B5 blue E-body door panel was a window crank unit with a surface that had seen much better days. Just Dashes craftsmen restored it to concours condition.
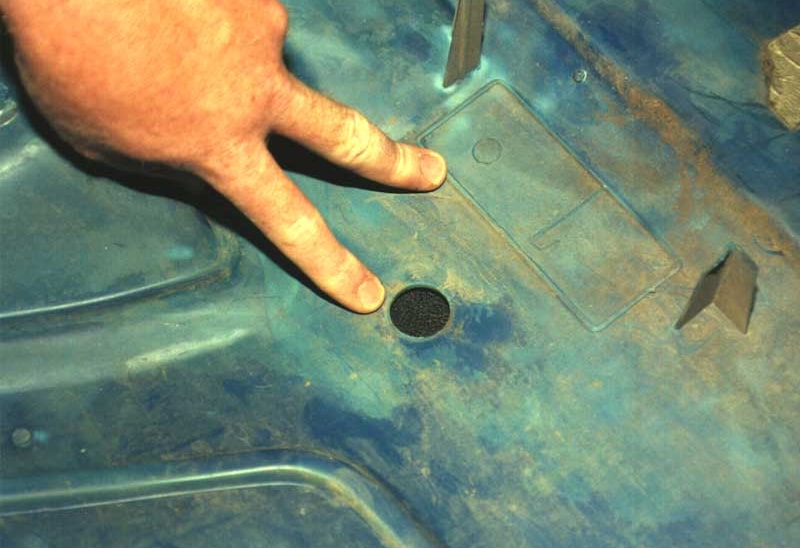
The rectangle for the main power window switch is formed into all the original hand crank door panels, this allow for an either/or usage. The round crank hole is about to go away.
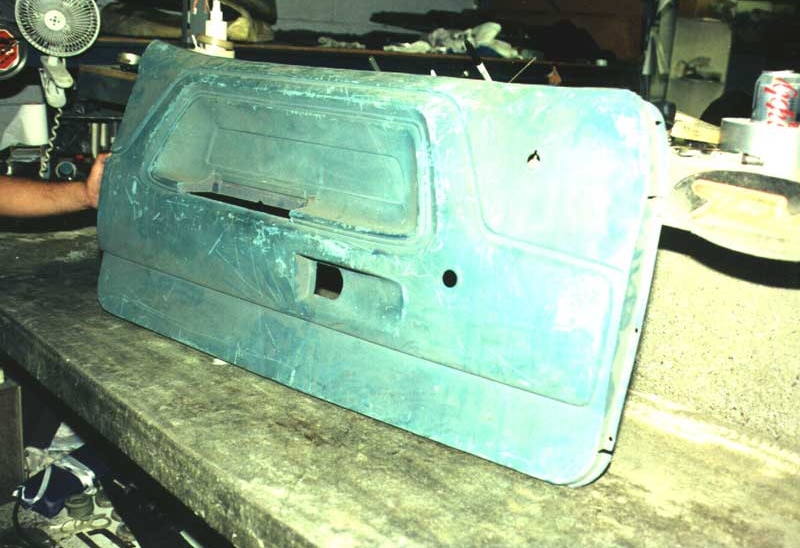
Here is the original door panel ready for the conversion. You can see the condition of the surface. Just Dashes has the magicians to turn even this mess into a thing of beauty.
The surface preparation starts with hand sanding the plastic surface. This will even out any shallow gouges and created a rough surface for the adhesive to cling to.
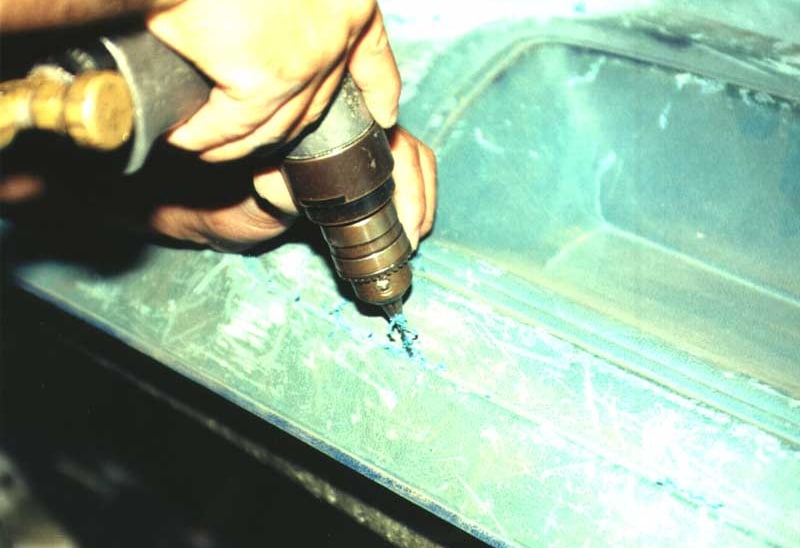
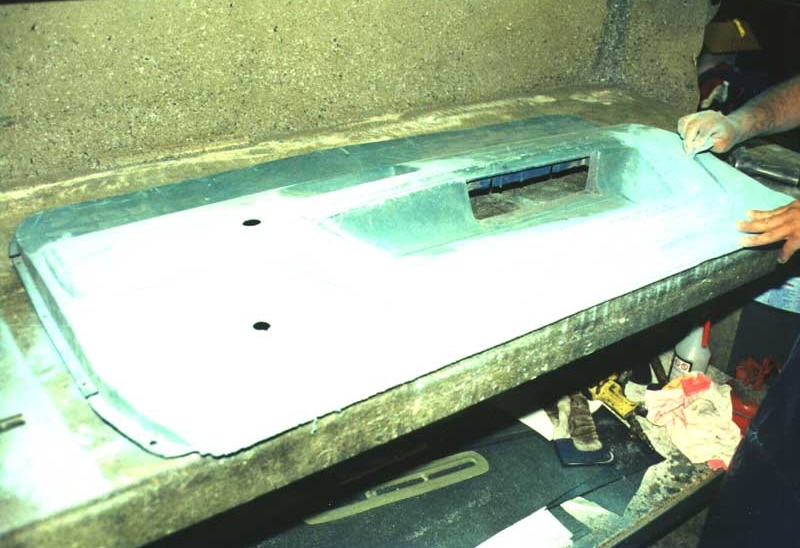
Small holes are drilled along the edges of the plastic panel to allow the vacuum machine to suck the material to the surface. These holes are not visible on the finished product.
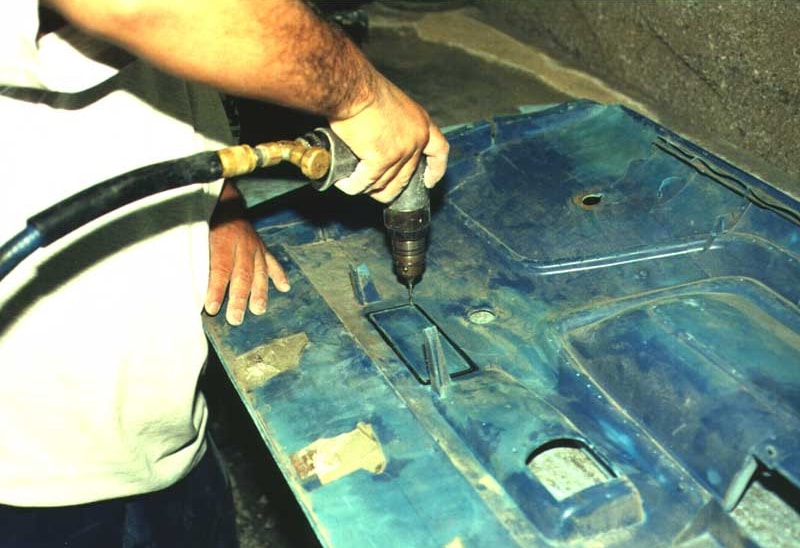
Starter holes were drilled in the four corners of the triangle for the saber saw blade. A cut was made from hole to hole and the corners received a 90-degree angle.
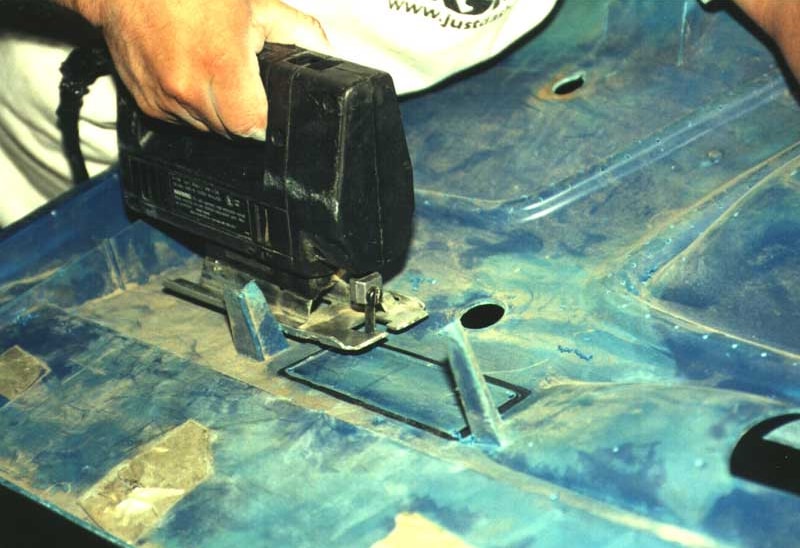
Starter holes were drilled in the four corners of the triangle for the saber saw blade. A cut was made from hole to hole and the corners received a 90-degree angle.