Restoring the 1969-’72 Pontiac dash pad
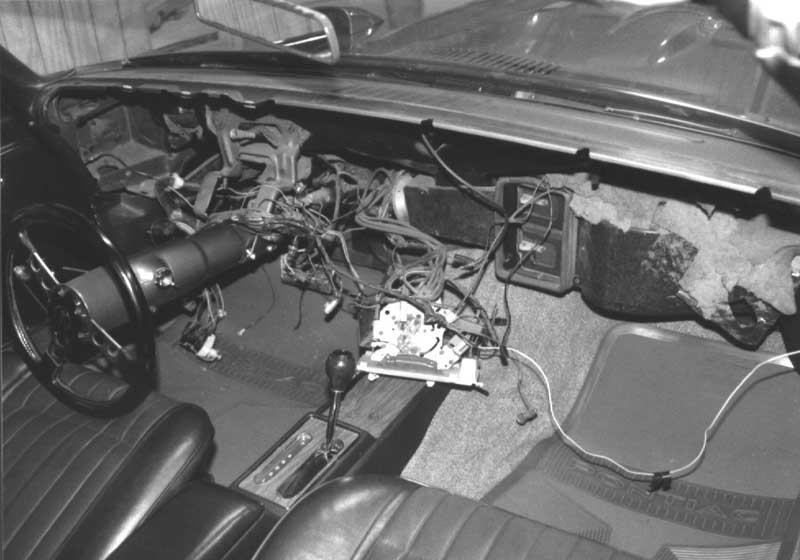
When is a dash pad not a dash pad? When it’s the whole dash assembly, including the instrument cluster, found in the late Sixties/early Seventies Pontiac A-bodies! When this huge hunk of vinyl deteriorates, the damage can be immense. And when removed, it’s like looking at a map of the United States and finding a big vacant hole where Texas used to be. Wires and stuff everywhere!
From 1969 to 72 Pontiac used the dash design described above. The Tempest, Le Mans and GTO were fitted with a dash fascia just about as large as some banana republics. Not only did the top vinyl surfaces crack but the front face also usually suffers the same fate. Over the years I have removed several of these pads, and while time consuming, the process is not difficult.
After having spent serious dollars in the past finding and redying a good original pad, only to have it eventually crack, this time I am having a total restoration done by Just Dashes. This way it will take another three decades of abuse before it needs another restoration.
If you own one of these cars and want to have your dash pad completely restored, the removal process is documented here. You can UPS your original pad core to Just Dashes or buy a core from them. After the resto is completed, in the correct grain vinyl and interior color, they will UPS it back, ready for installation. Check with Just Dashes for pricing and info particular to your car.
Removing the pad starts at the glove box. A helpful hint is to place the screws and other retainers in plastic zip lock bags and label the bag with where they came from. This will make the reinstallation a lot easier. Remove the Phillips screws retaining the glove box liner and then the Phillips screws securing the door. If your car is equipped with air conditioning, as this vehicle is, you must drop the under dash ducting by removing three large Phillips head screws. Detach the ducting to each side vent and center duct and remove it all from the car. Next remove the metal trim panel under the steering column, again three Phillips screws. Then remove the two 5/8-inch nuts holding up the steering column and drop the steering wheel down to the seat. Now we can get serious!
Above each gauge pod there is a Phillips head screw. Using a short screwdriver remove all three. Working through the glove box hole locate and remove three 1/2-inch nuts securing studs along the top underside of the pad. These are easily found by looking under the dash. Now reach up through the U-shaped area where the steering column was and disconnect the speedo cable. It is held in place with a pressure clip. Push the clip in at the bottom and pull the cable out from the back of the gauge cluster.
Remove two 9/16-inch bolts from each lower corner of the pad which secure it to the car and two more on either side of the steering column hole. You can now pull the pad forward enough to see behind it.
The radio is removed next. Pull off the buttons and bezels and remove the 5/8-inch nuts from the control shafts. Unplug the radio harness and antenna cable from the radio and pull it out of the dash. Leave all wiring under the dash. Next locate and remove four 3/8-inch nuts securing the heater controls to the rear of the pad. I prefer to leave these controls intact so I remove them from the pad and simply let the assembly hang. If your car has A/C remove one screw holding the large plastic duct to the vent in the pad prior to removing the controls.
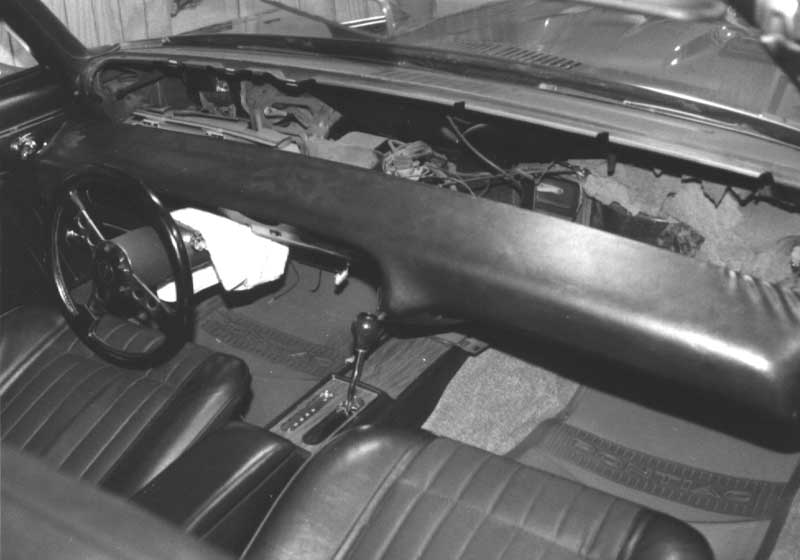
Reaching behind the instrument cluster, unplug the two lights at the clock (if equipped), unplug the primary wiring harness from the back of the instrument cluster, d isconnect the ash tray light (if equipped), remove the wiring harness from the plastic retainer running along the top of the cluster, unplug the cigar lighter connection and in the case of this convertible, disconnect the power top harness at the fuse box. With all the connections free, carefully pull the pad free of the mounting areas and lift it from the car.
The arm rest pads on this ’70 GTO convertible had seen better days, so they will be treated to Just Dashes vacuum forming process and restored at the same time as the dash. Almost any vinyl covered part you can remove from the car can be restored by Just Dashes, including door panels, head rests, etc.
We then followed the restoration process from beginning to end at Just Dashes and brought home a beautifully restored part, soft, pliable and ready to reinstall. Obviously the installation is just a reversal of the removal, but you should detail all the parts before reinstalling them. Use a toothbrush on the radio and other knobs, dismantle the instrument cluster and polish or replace the plastic lens, install a quartz clock movement, etc. Hopefully you will never have to remove your dash pad again, so take advantage of the opportunity to clean everything including under the dash, wiring, ducts and whatever else needs attention.
Don’t be intimidated by the photos, the wiring is very basic with one plug in at the cluster and a few other simple connections. Any novice restorer can accomplish the removal in an afternoon with normal hand tools. No cutting or drilling is required, and everything is straight forward. This is one of the best restoration projects you can do to your interior and one you’ll never regret, particularly while driving your Pontiac.
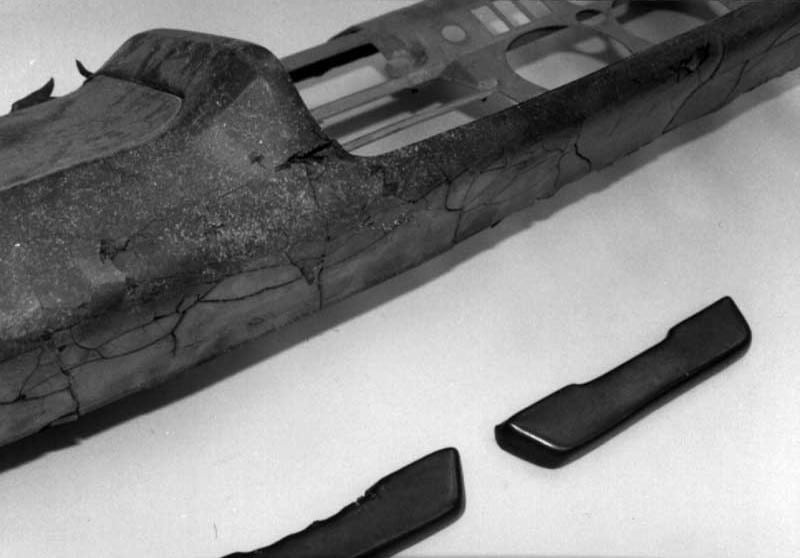
While our pad was not nearly as bad as this, I wanted to show you just how rough this full dash pad can get. Even as destroyed as this, Just Dashes can return a concours quality restoration.
If your Pontiac is equipped with air conditioning you must drop the large plastic dusting under the dash. After removing the glove box and liner you can get at the plastic ducting as well and pull them out. Many years of dust has accumulated on these parts.
After removing the lower metal trim panel the two nuts holding up the steering column can be removed and the column dropped on the seat. No wiring need be disconnected from the column.
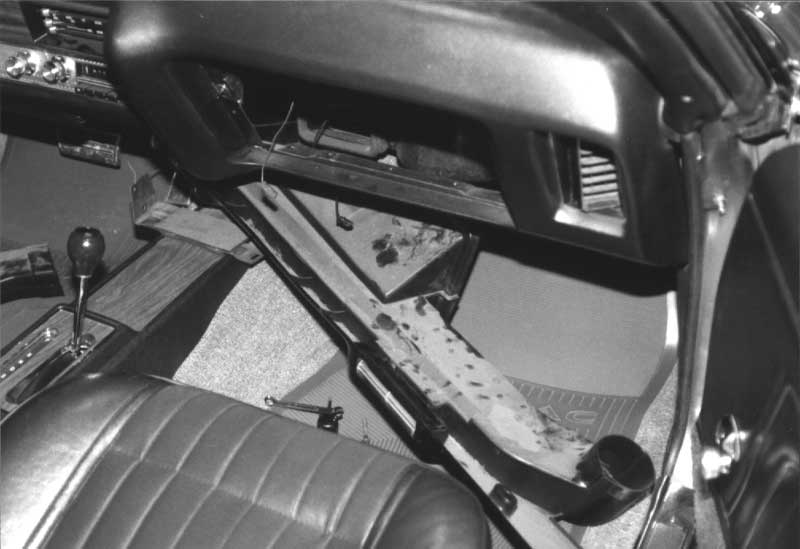
There are six retainers along the top and four bolts along the bottom to remove. After the speedo cable is disconnected from the pressure clip at the back of the cluster, the pad can be pulled forward. A towel on the steering column with prevent paint damage.
The dash pad can now be removed from the car and stripped of instruments, vents, etc., before shipment to Just Dashes. This pad has several large cracks along the top edge and wrinkles in the vinyl at each corner.
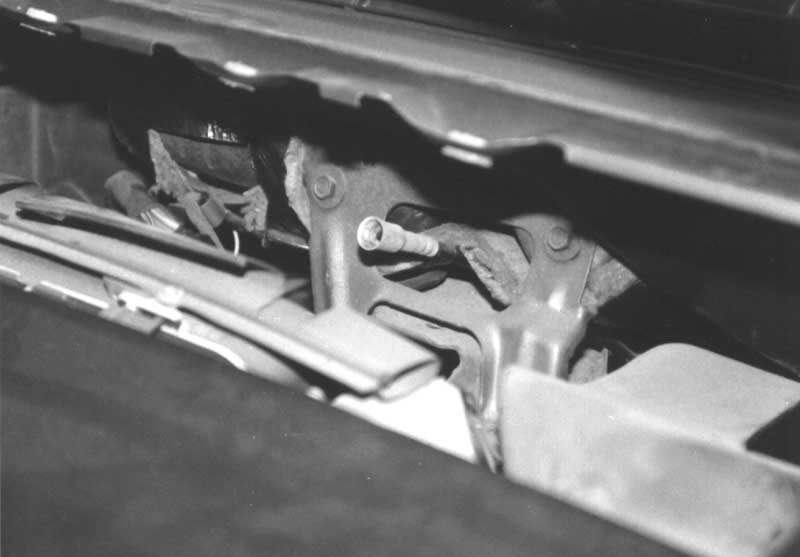
The speedo cable snaps into the back of the cluster and MUST be disconnected prior to pulling the pad forward. All connections have been disconnected at the back of the cluster and the radio and heater controls have been removed from the back of the pad.
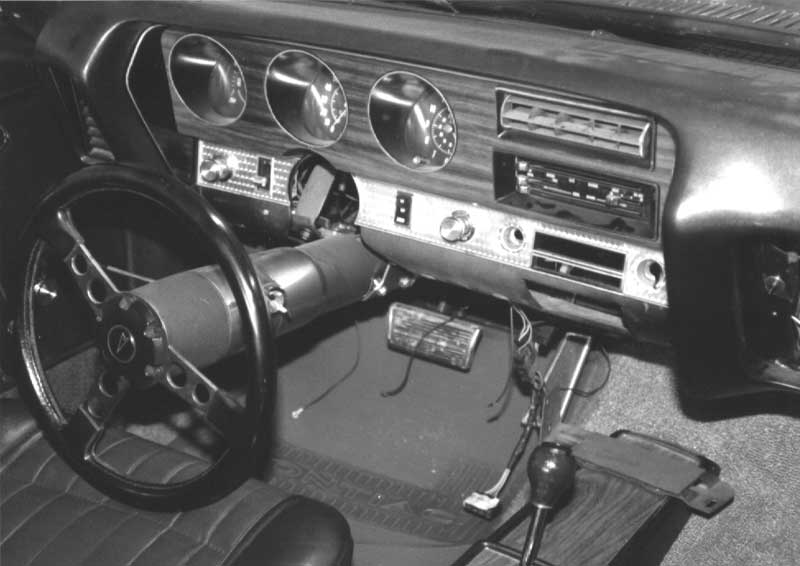
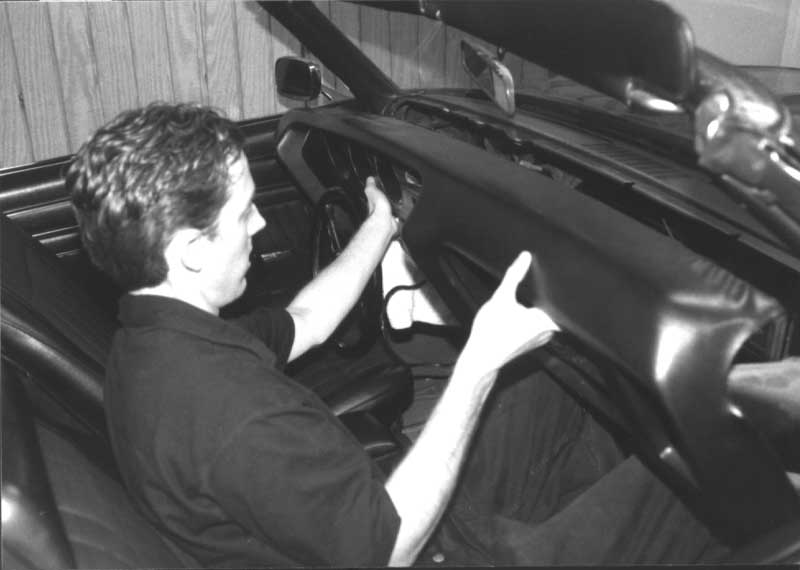
While it might look intimidating, it’s really very simple. There are only a few connections to make at the rear and you can see the complete A/C, heater controls resting on the console. Notice the headlight switch hanging on the left.
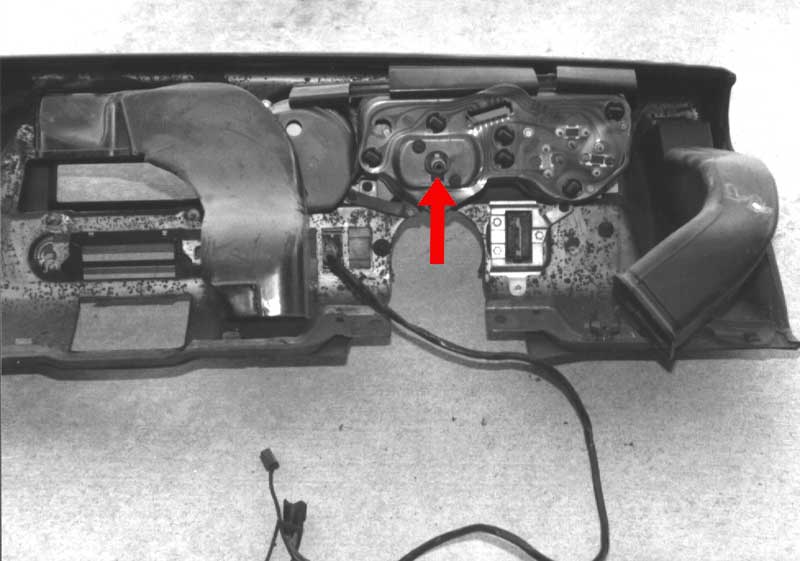
Here is the instrument cluster from the back side. The center vent/duct is for A/C cars only. Arrow indicates clip at speedo which secures cable to cluster. A printed circuit controls instrument lamps, gauges, etc. Rectangular slot to the top left of speedo connection is the main wiring harness plug-in point.