Add gauges to your muscle car or street machine

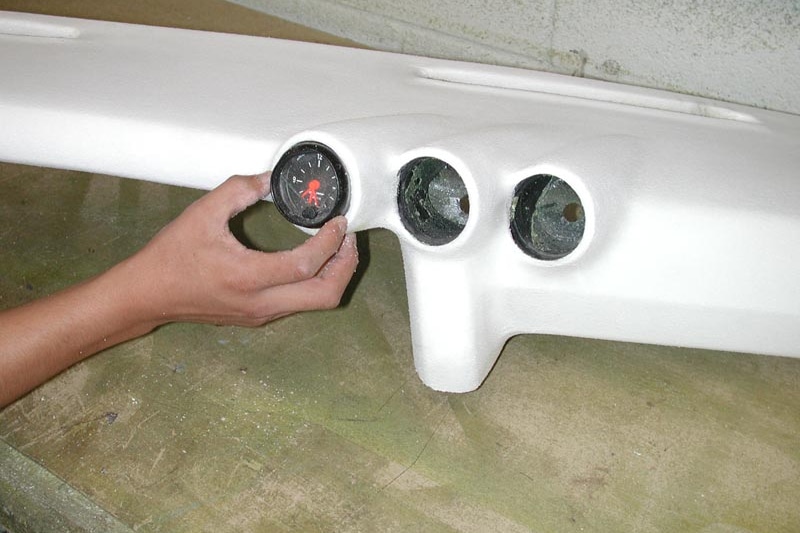
Here’s the finished product with three gauges installed. Like any gauge install, you have to feed your wiring and sensors to the correct locations, and may have to drill an access hole in the metal dash underneath the pad to accomplish this.
Your gauges provide a daily physical exam for your engine! Sixties and Seventies muscle cars, many of which are today’s modified street machines, came with “idiot” lights or only the bare minimum of actual gauges. Add-on aftermarket gauges were required to really tell what was mechanically going on with rpm, oil, water, amps, trans fluid, etc. Today, we also need to monitor boost pressure, fuel pressure and more. In this case the “more” means more gauges.
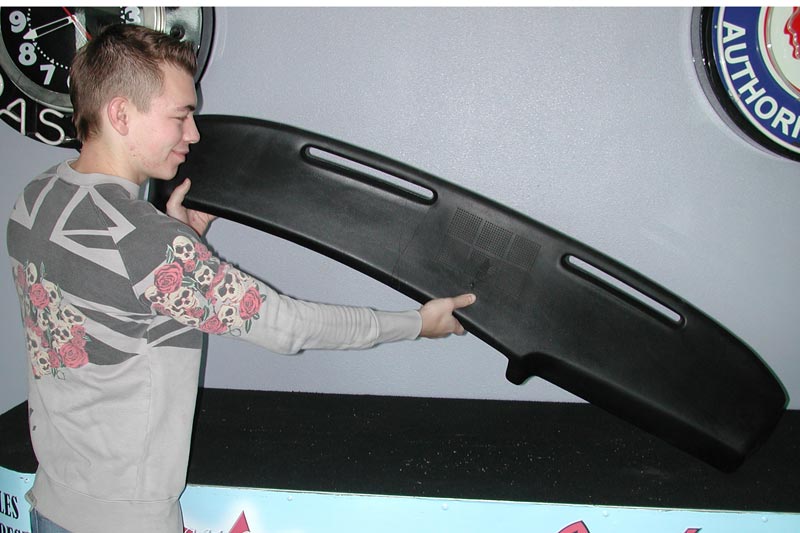
For decades, auxiliary gauges were mounted under the dash, making them hard to monitor without taking your eyes off the road or track. To solve this age-old problem, Just Dashes has engineered dash pads for many different muscle cars and street machines that have three (or more when possible) gauge pods built into the front edge of the dash pad. The pods will accept any 2 1/16-inch gauge of your choice, and can be read with a quick glance to the right. No more looking down and taking your eyes off the road. A quick sideways glance tells it all!
The shape and thickness of the original dash denotes whether or not the pods can be installed, so you should check with folks at Just Dashes for your application. The pad under construction here fits the 1970-’72 Chevelle, Malibu, Monte Carlo and El Camino. But Camaro, Oldsmobile, Mopar and Pontiac applications are now available, with more to come!
Just Dashes has a huge core bank of original dash pads, so if you want to keep your stock pad, in order to put the dash back to factory original, you can purchase a core from them. That way they can quickly create your pad and have it delivered to your door by the big brown truck.
We followed along through the process of adding three pods to this ’70 Chevelle dash in order to show you how it’s accomplished, and how cool it looks when finished. As with many automotive projects, it has to look bad before it looks good again. It’s a really interesting addition and the end product is not only excellent, it also make motor monitoring while driving a lot safer.
Each dash is thoroughly inspected prior to starting the job. The pad must be straight with no frame damage. The condition of the vinyl and foam makes no difference, as it might need to be completely replaced anyway.
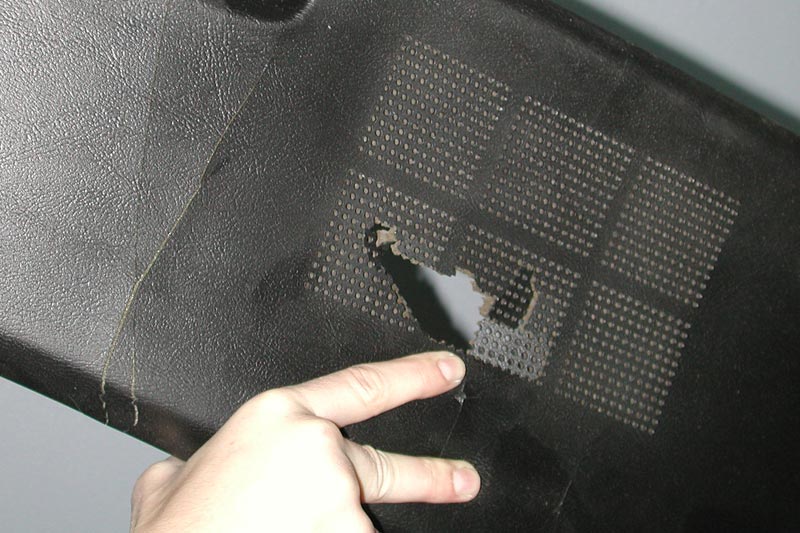
The speaker grill area has the usual damage from years of use. Notice the large crack to the left. Otherwise, beside being dried out, this pad is a good candidate for the pod installation.
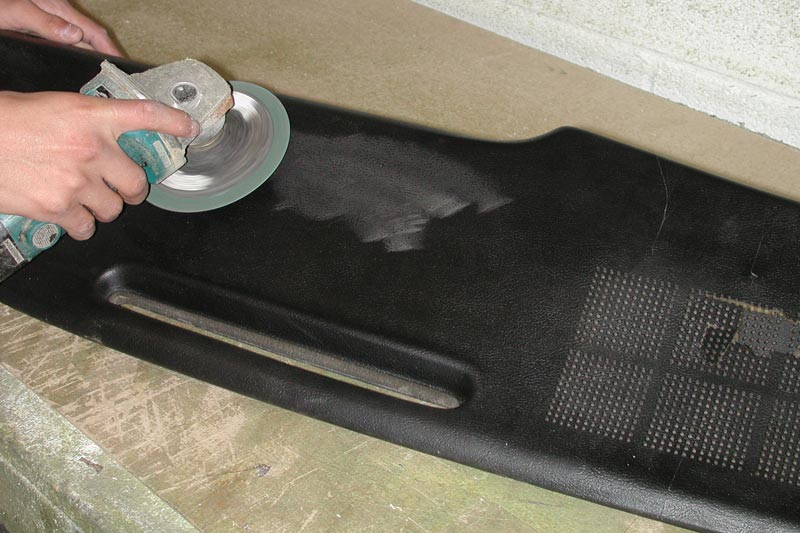
If all the original vinyl doesn’t need to be removed, the entire surface is sanded to remove any other imperfections and provide a good working platform.
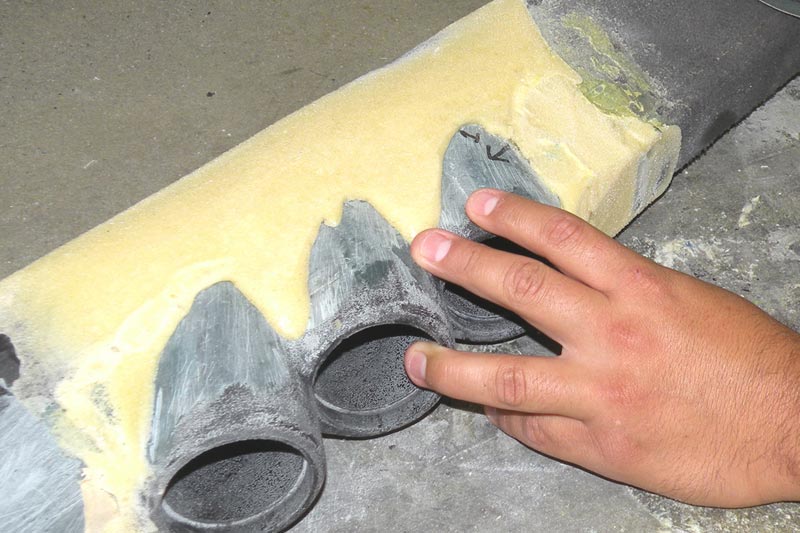
The preformed pods are now initially attached to the pad and rough formed with the sander. Rather than visit every single step, we’ll just cover the high points of the process.
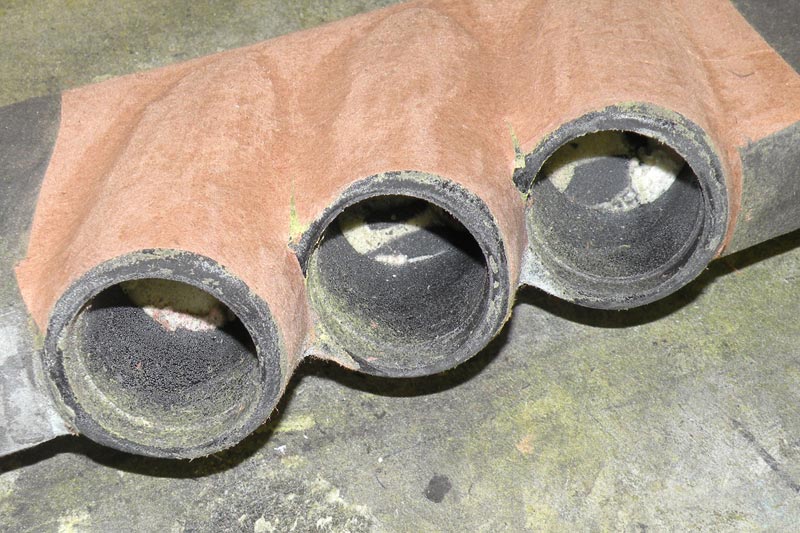
Here’s the second step in forming the pods to the surface. An additional layer of material is added and hand formed to match the contours of the pad.
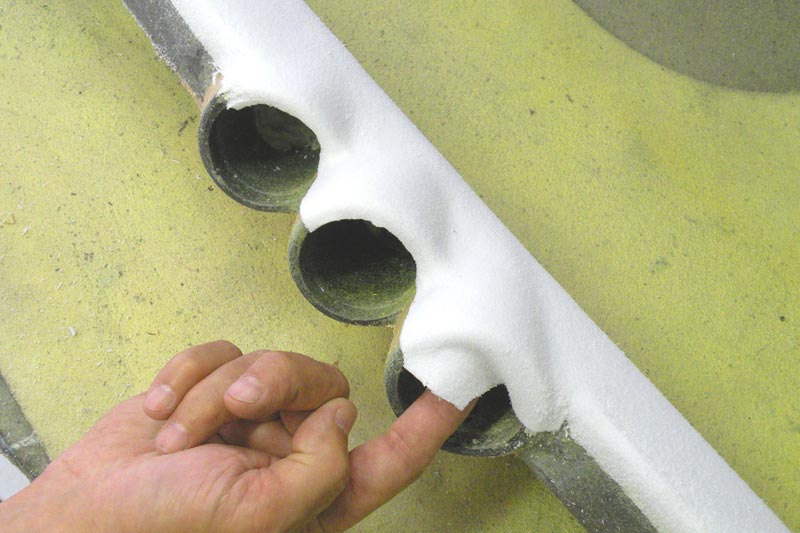
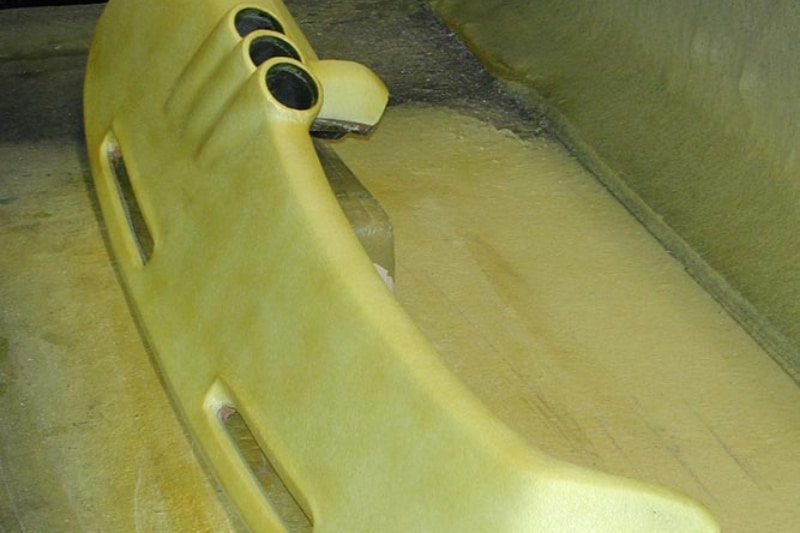
Once the pods are molded into the front edge, a layer of closed cell, high-density foam is added, completely covering the entire pad.
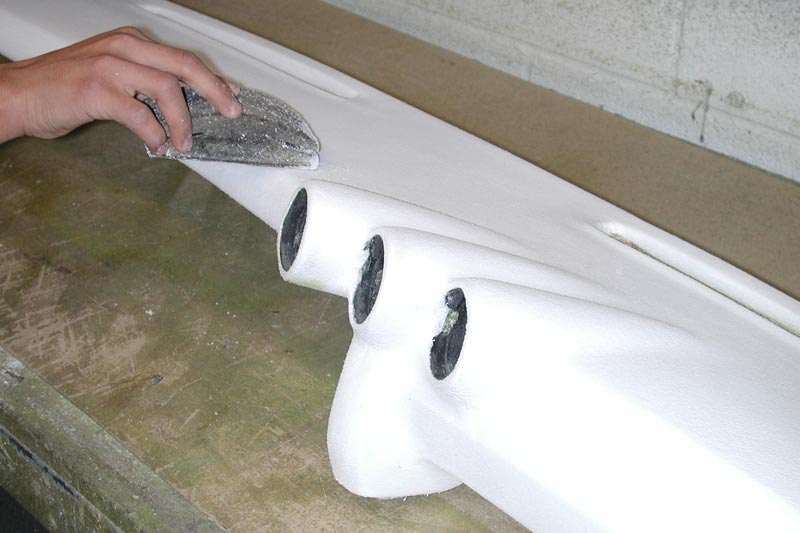
The foam layer is now hand sanded to perfection. Most of the work of restoring a dash pad, or modifying one like this, is all done by hand. These guys are craftsmen.
Throughout the process, a 2 1/16-inch OD gauge is used to constantly check the tolerances of the pods. The gauges pressure fit into place, so the openings must be exact.
Once the foam work is finished, the pad gets an even coat of professional grade adhesive, which is then allowed to tack up before the new vinyl skin is applied.

Once in the Thermo Vacuum machine, the part must be supported by rags and wooden blocks. The vacuum is so strong it would distort the pad without this support. It looks weird, but it works great as you’ll see.

A heated sheet of vinyl, in the correct grain for the vehicle, comes out of the oven directly above the part. The lower tray is now raised into the hot vinyl.
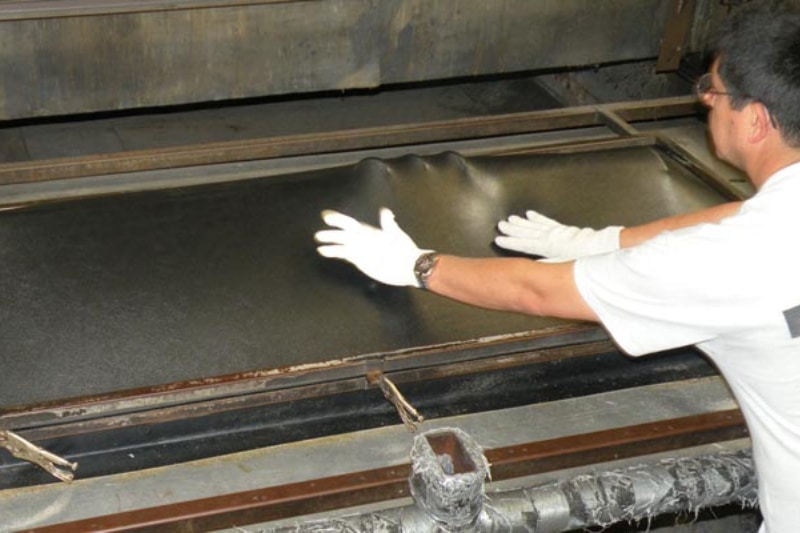
Here we see the part starting to push up against the vinyl. The vacuum is now applied, sucking the vinyl down completely around the dash and into every area.
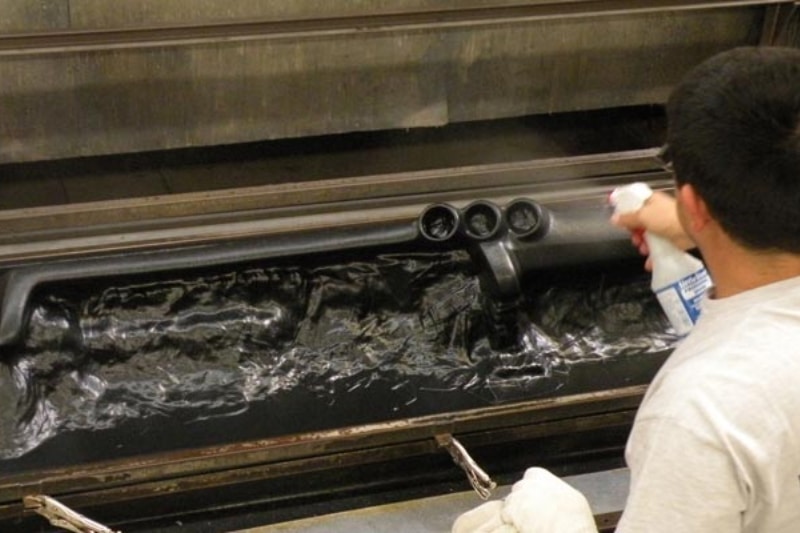
Once the vacuum is finished, the part is squirted with water to help cool and set the vinyl. You can see the way the material has been pulled inside the three pods.
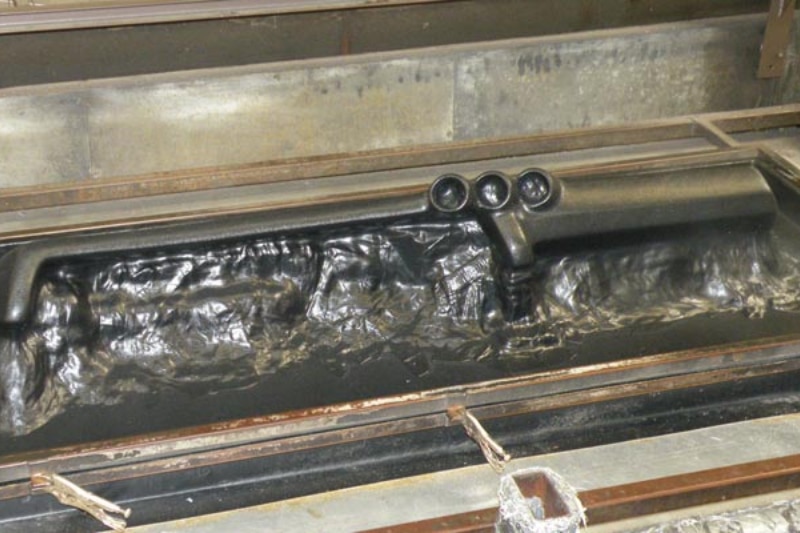
Here’s the view of the pad ready to be removed from the machine. The excess is cut away, leaving enough for the trimming department to do the finish gluing and trimming.
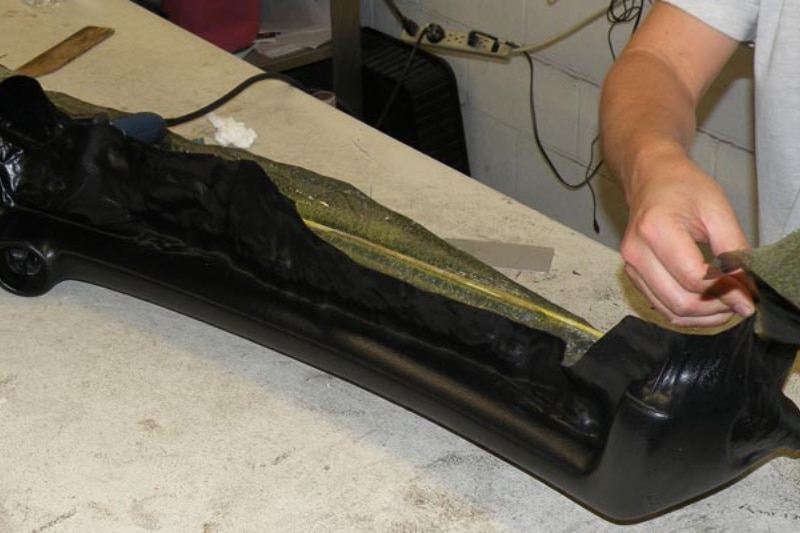
The pad is now finished trimmed, the pods opened up at the back for wiring, etc. and again, lots of handwork. Once finished, the pad will go to the coloring department for a stock factory color, or any custom color you might need. It’s a pretty amazing process!